
Kitchen Renovation | What we’ve been up to for the last 5 months…
At the end of August 2014 Jim and I bought a house. Off and on for several years, we had been searching for something with a little more space for our growing family. For whatever reason, I always seemed to be drawn to the ones that needed a little bit of “help,” and the one we ended up buying was no different. I’m not gonna knock it too hard though, because it just-so-happened to be the home of the family of one of my senior portrait clients from five or six years ago. When we first looked at the house, we turned the corner into the living room and boom…! “Hey! I took that photo!”
When we looked at the home, I immediately had a plan for it. Here’s how it looked the day we first saw it, and my corresponding thoughts:

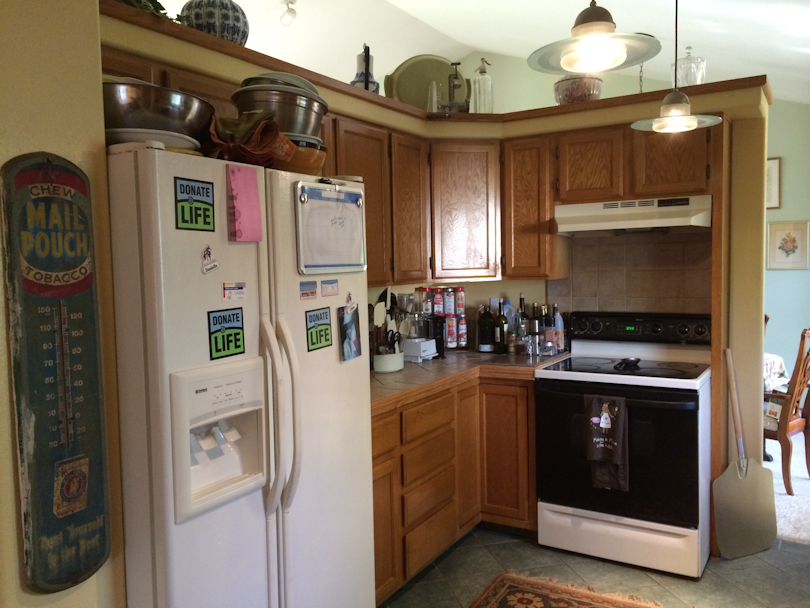
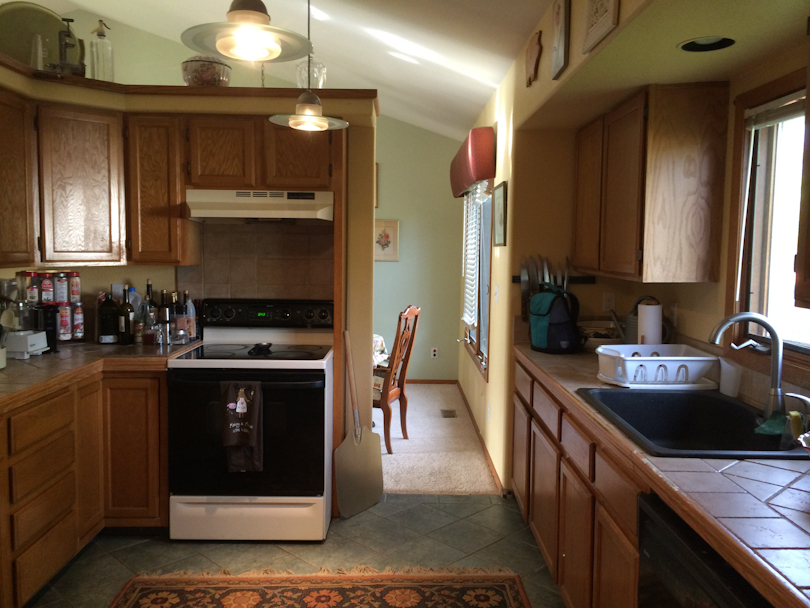
Here’s the old kitchen behind the partial walls that separated it from the living room and dining room:
Here’s the old dining room, which is now the location of the new kitchen: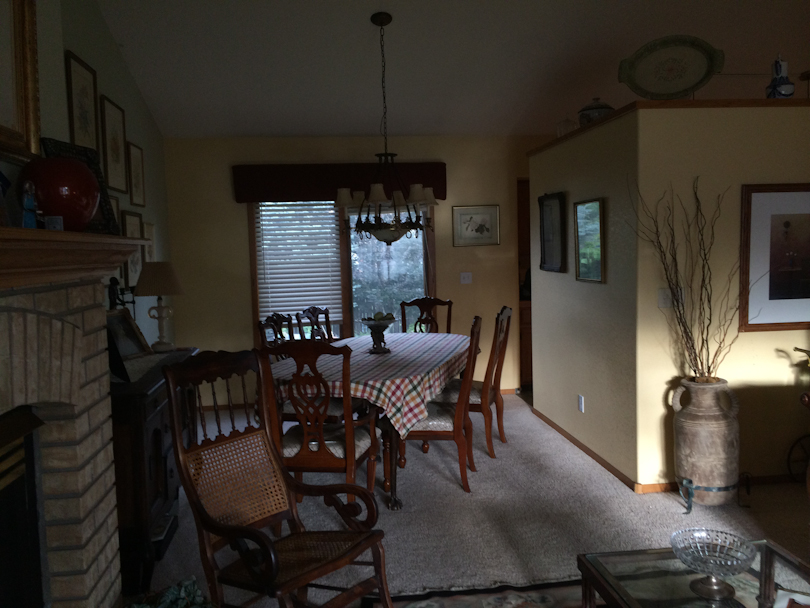
While we waited for our house to sell we spent our efforts upstairs painting the walls and laying hardwood flooring. We barely finished those projects before it was time to move in at the end of October. And now that our house had sold and we weren’t stressed about paying two mortgages, it was time to tackle the main level.
Moving a kitchen was no small task, and there are quite a few projects I unfortunately didn’t capture with the iPhone. But here’s a small peek at some of what was involved in our DIY kitchen reno:
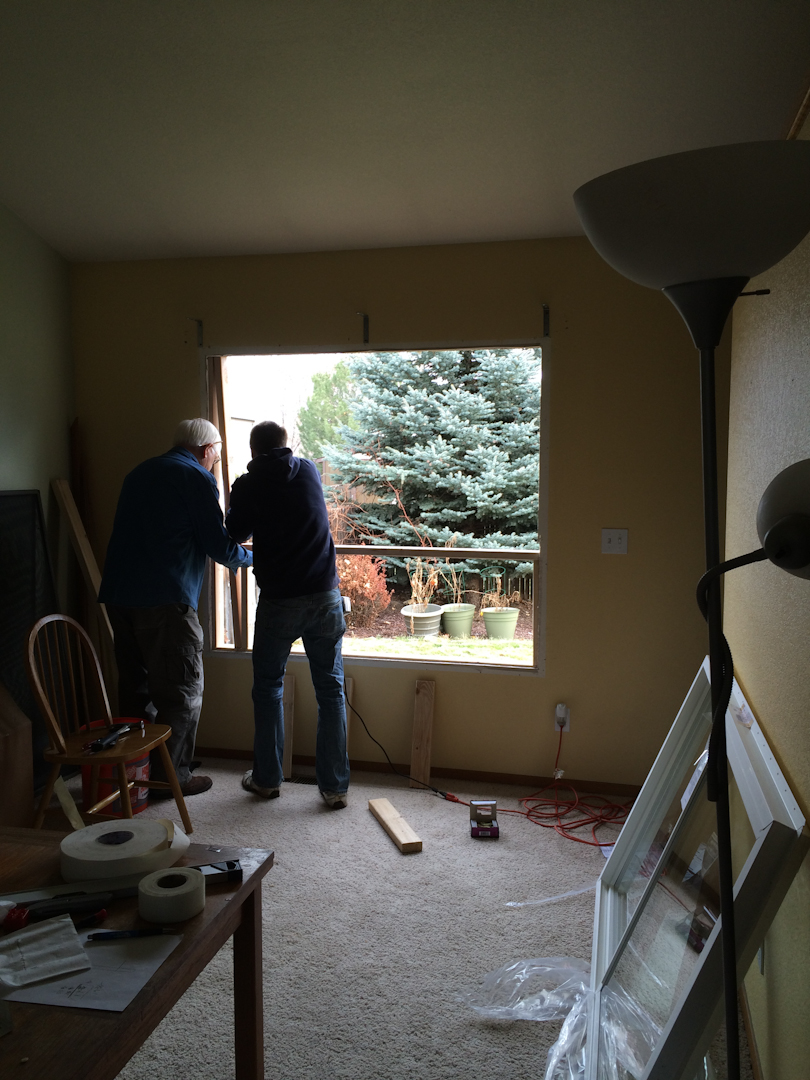 One of the first tasks was to get a smaller window in the space where our kitchen sink was going to be. Though it felt like a serious sin to replace a big window with a smaller one (losing a little bit of natural light), it was what we needed to do to be able to put cabinets and a sink/faucet in front of it. Here are Jim and his Dad framing the window for the new one. Jim’s dad also spent a week or two helping us move all of the electric (THANK YOU!), which was one of the most time-consuming parts of the project. No photos of that though….
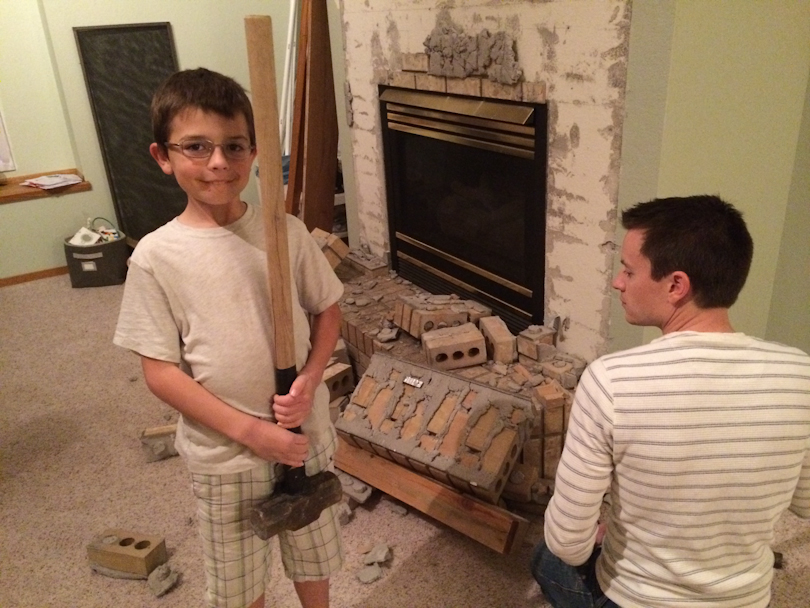
Next we busted out the 1990 fireplace. James and Colin especially enjoyed helping out with the sledgehammers…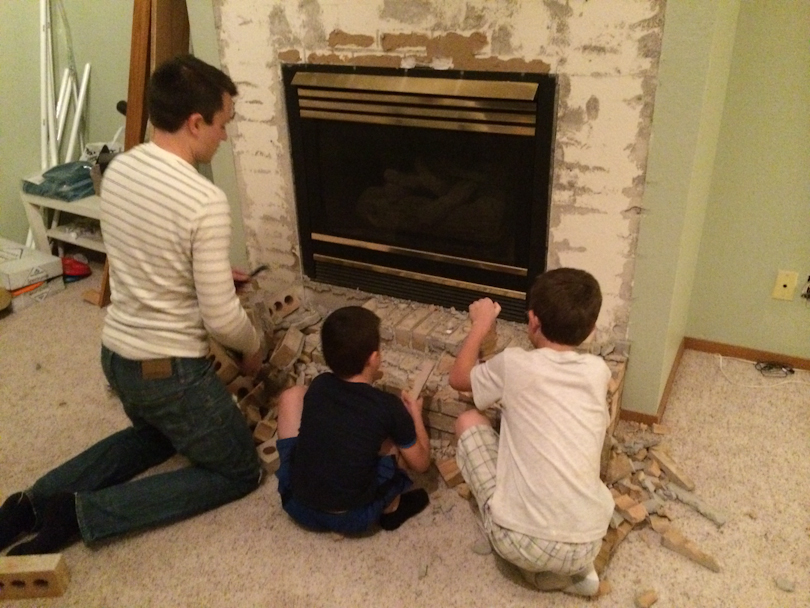
 I think this is what our house looked like around Thanksgiving. Yay….
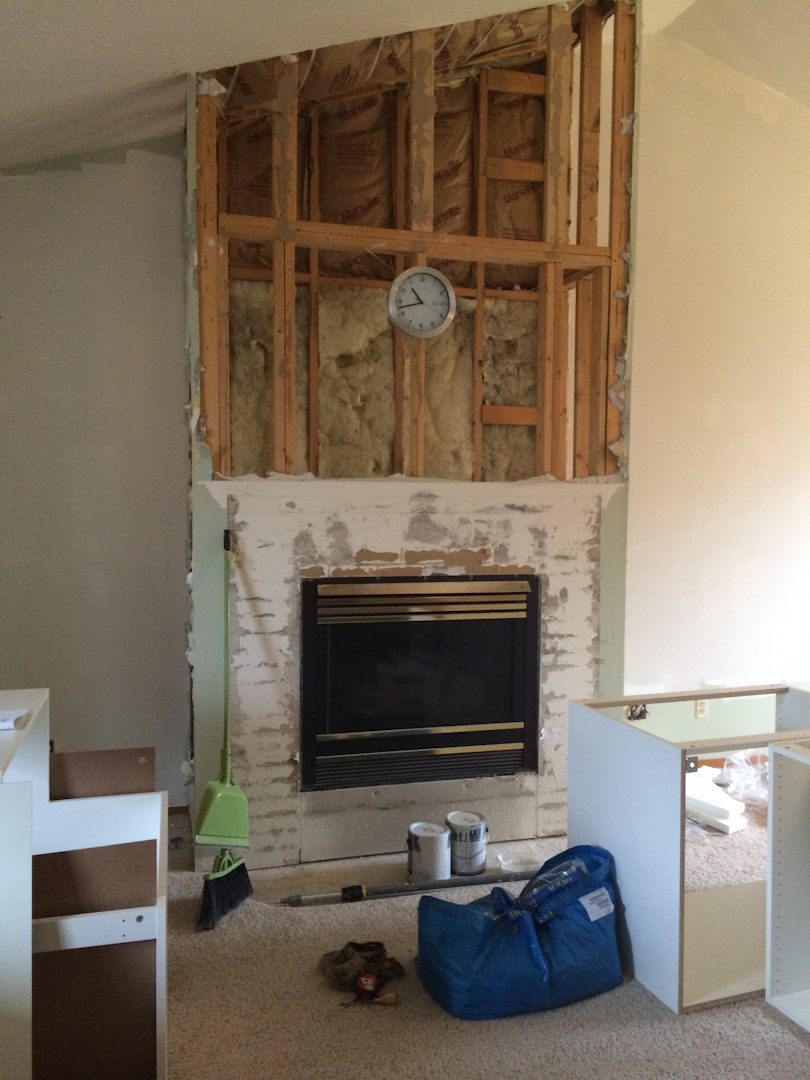
 Then it was time to take down the wall that hid the old kitchen. There was one night I just didn’t want to wait for Jim to come home from work to get started, so I plugged in the reciprocating hacksaw and got half of it down solo. I think I earned 100 cool-points from my boys that night. :)
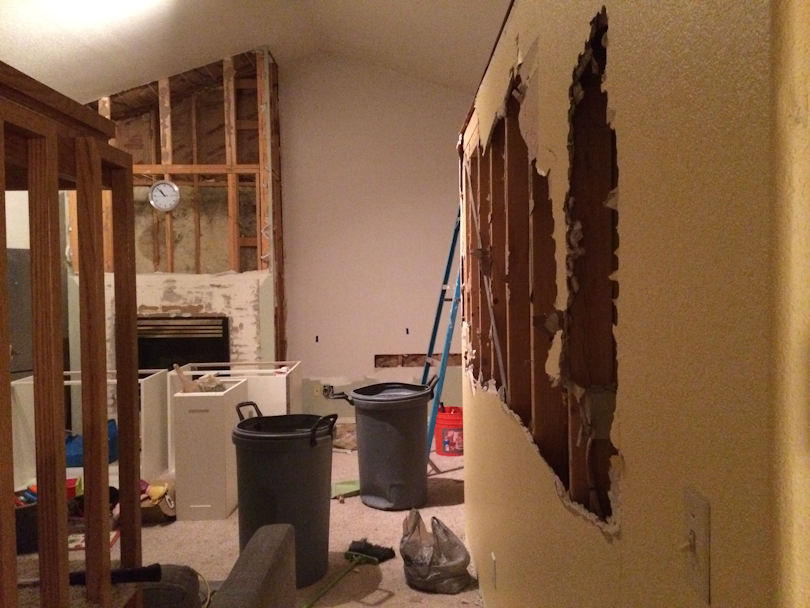
 At this point of total destruction/chaos, tired of inhaling drywall dust, irritated with walking on sub-floor, accustomed to tripping over power tools strewn over our “house,” sick of pizza/fast food dinners, and living with a barely functional kitchen, I’m pretty sure we were standing here saying to each other, “WHAT! WERE! WE! THINKING?!?!” :)
 Drywalling over the area underneath the new window so we could get the cabinets in:
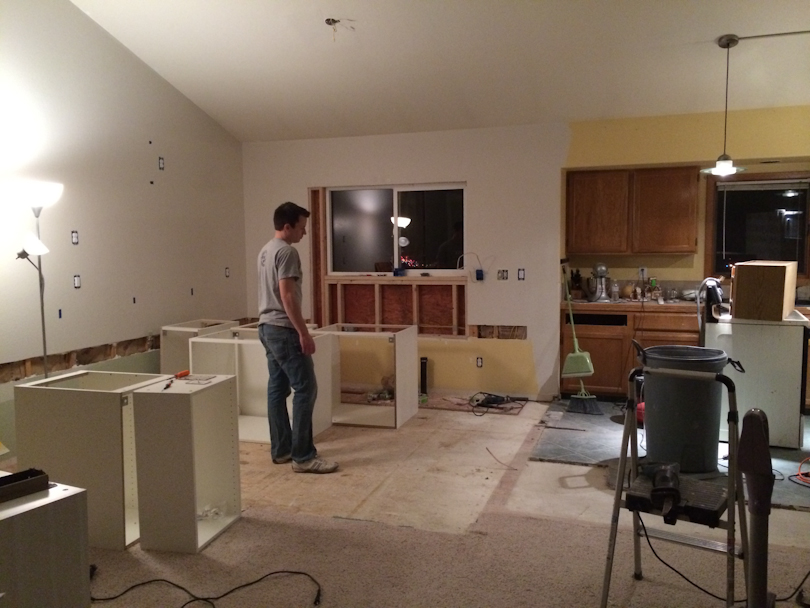
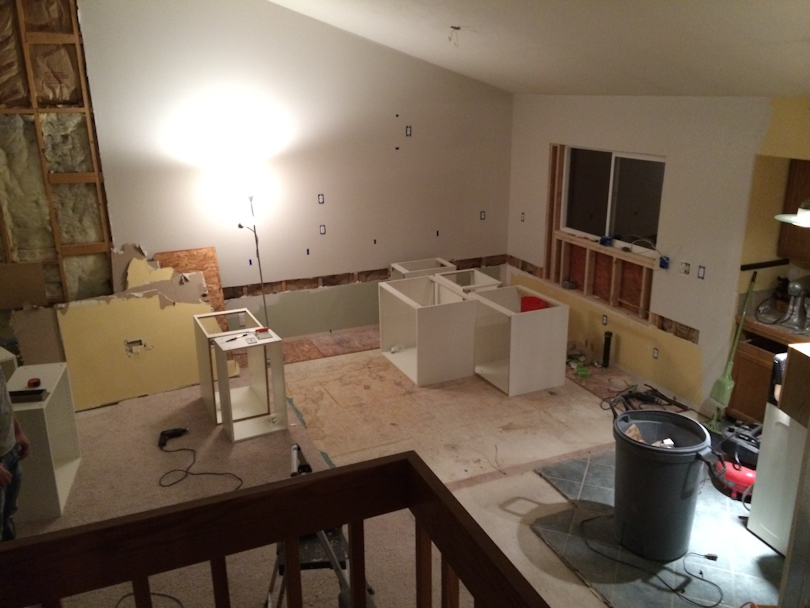
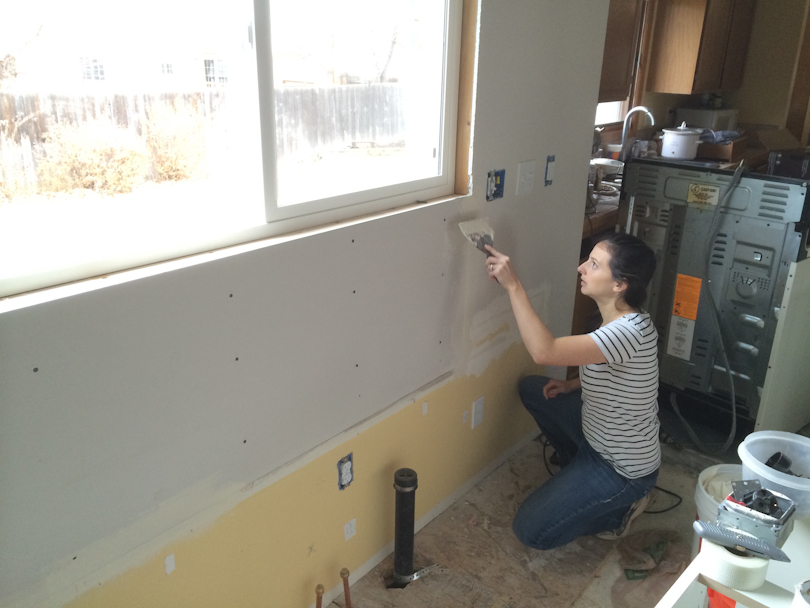 Cabinets are assembled, in place and ready to be measured for countertops. I used to think putting together Ikea furniture was tough/confusing/annoying, but after assembling most of these Ikea kitchen cabinets, I feel like an Ikea furniture-assembling professional.
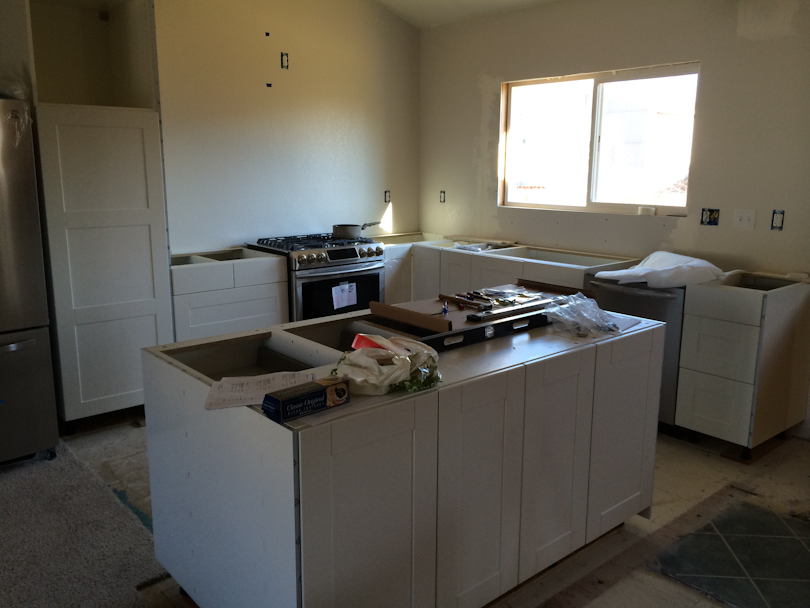 Make way for the recessed can lights:
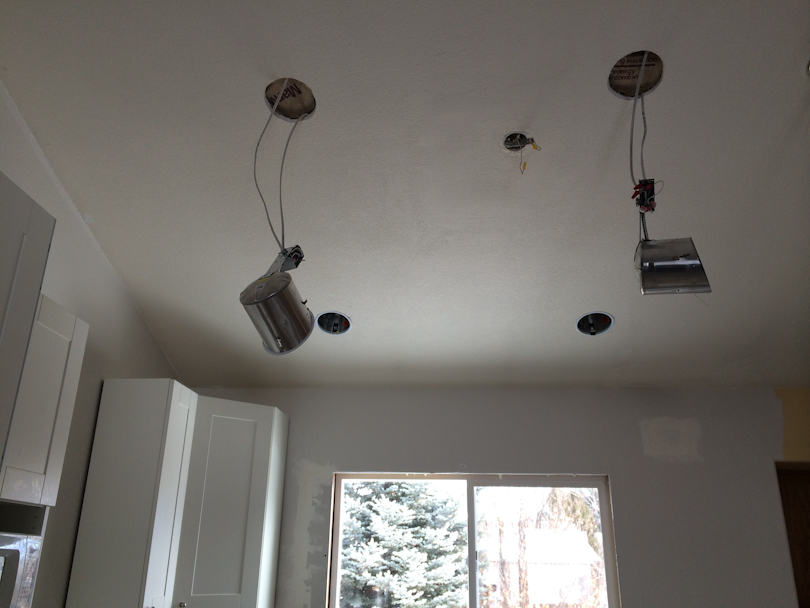 I cooked our Christmas feast in the kitchen at this stage…oh, that was joyous!
 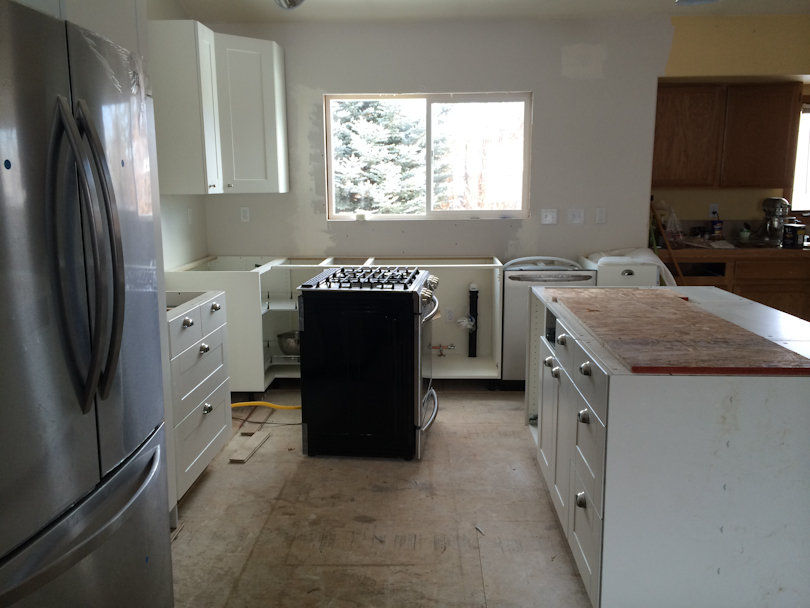 Drywalling over the gaping hole that was left after removing the fireplace. If you come over, promise me you won’t look too carefully at our not-so-professional drywall skillzzz. :)
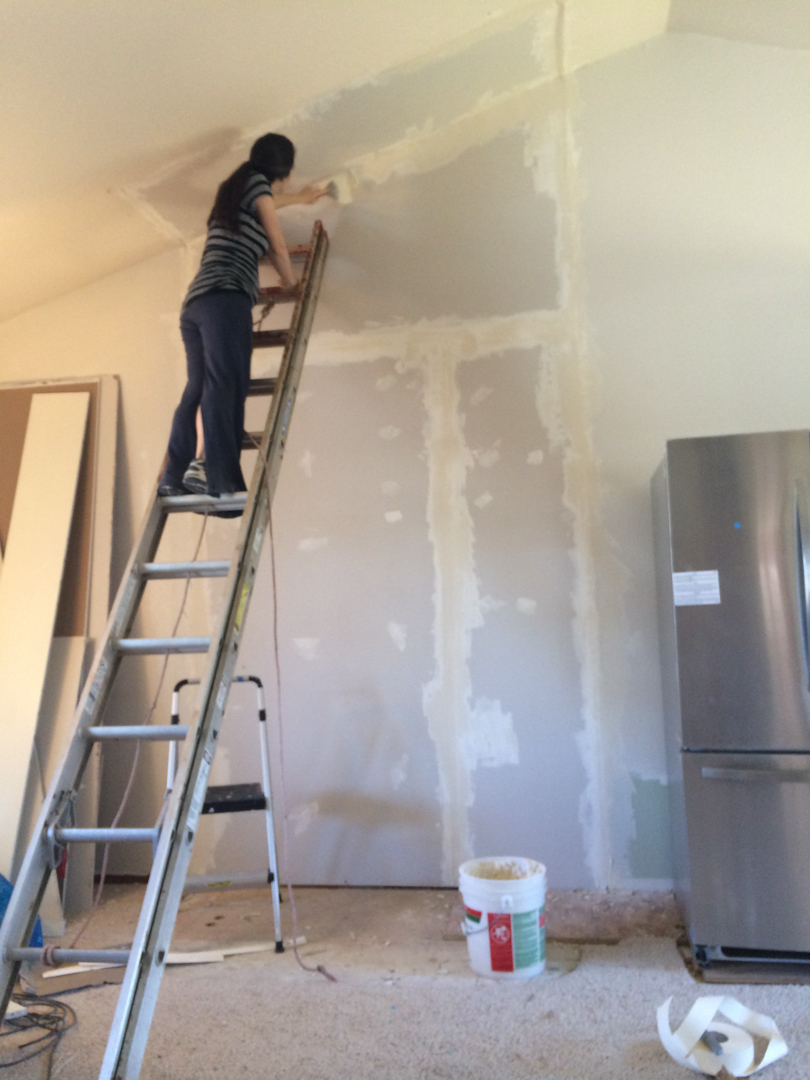 In January we got our countertops, which meant we could finally get rid of the old kitchen. Habitat for Humanity was the recipient of all of the cabinets and most of the old appliances.
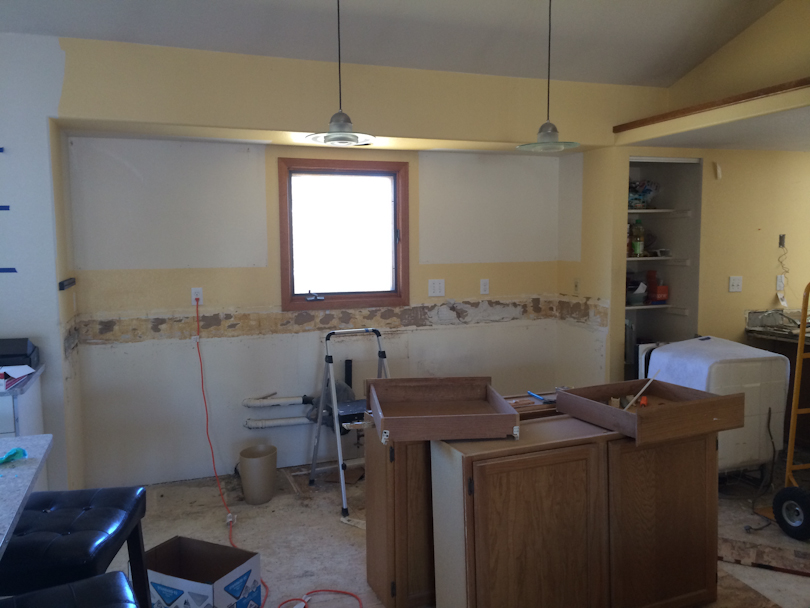 Then we put in the hardwood flooring. I don’t think I ever got any photos of us laying the floor in the kitchen, so here’s one from when we did the upstairs. For the most part, I would lay out the pieces in a perfect mix of knotty – no knots – a few knots – no knots…..and measure and then cut the end piece of each row, while Jim back-breakingly nailed each one in. Every once in awhile we’d switch roles…but….let’s be honest…..Jim was much better/faster at using the nail gun than I was.
 After the floors were sanded we applied Rubio Monocoat, a product that I discovered while browsing Houzz that seems to be big in Europe and less-known in the U.S. I spent days (weeks?) researching different options for finish, and this is what I picked. It has a completely matte finish and zero VOC. Special bonus, it was really quite easy to apply with the buffer we rented. And it holds up extremely well with lots of kid traffic.
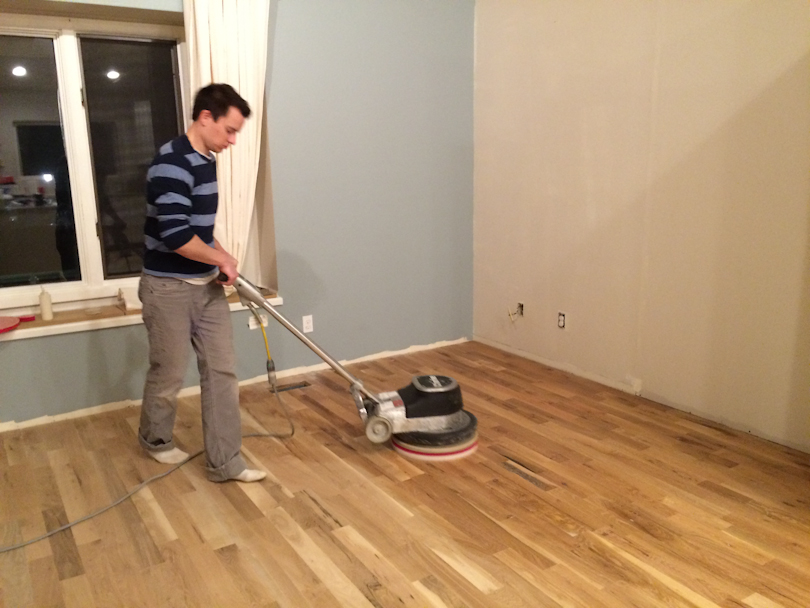 I made some open shelving out of the scrap slab of butcher-block oak that we had used for another project. And there were other un-documented steps along the way that seemed to take awhile to get done since none of them were pressing….like getting the range hood mounted, installing the toe-kick at the bottom of the cabinets, rerouting the return heat vent that had been in the wall that we removed, etc., etc., etc. Finally, it was time to install the kitchen backsplash. Most of the design choices were easy for me, but picking a tile for the backsplash was tough. I had samples lined up against the wall for over a week before finally making a decision.
  Cutting glass tile was way more “fun” than I was expecting, but it only took two nights of Jim and I working to have it in and grouted. Oh, and by the way, I’m 7.5 months pregnant. :) I definitely made Jim lay the tile that was in the far corner…my belly just wouldn’t let me reach that far.
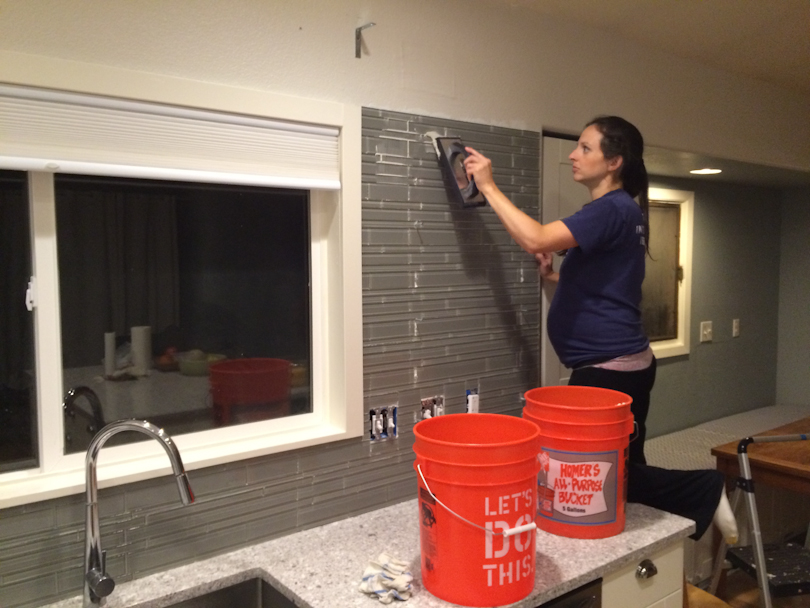 And that was the final piece to finishing our kitchen! Here are some final kitchen shots, with some before and afters mixed in so you don’t have to scroll all the way back to the top to remember how far this space has come:
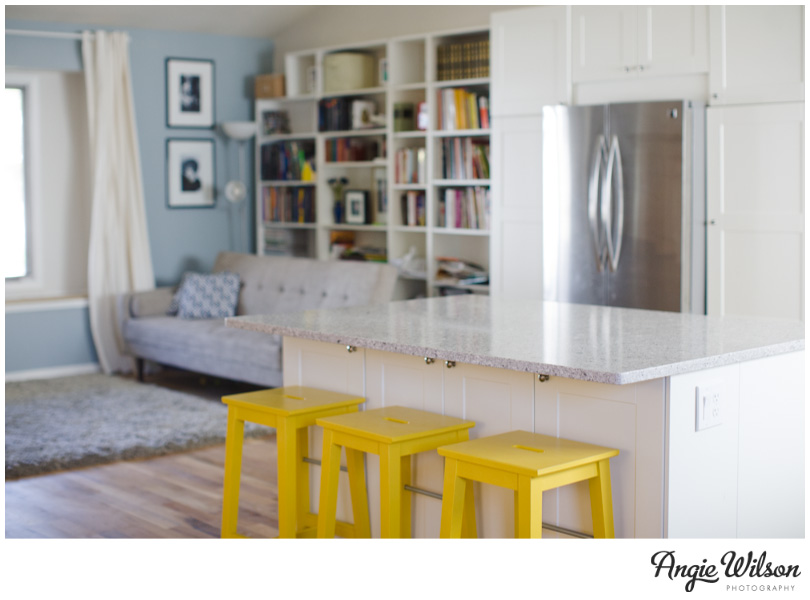
With Jim’s help, I painted those barstools to add a little excitement to our grey and white kitchen. Sadly, the first yellow I had picked was a little too sunny/pastel, and it was just “off” enough to bother me to the degree that I knew I had to re-paint. Luckily I got the color right the second time around.
I also made that white window valence out of leftover 2×4’s and plywood we had in our garage. Same story with that. I initially covered it with a geometric navy and white fabric that I had picked out before we put in the backsplash. After the backsplash was in, I felt like it just competed too much, so I started over and covered it in a white fabric.
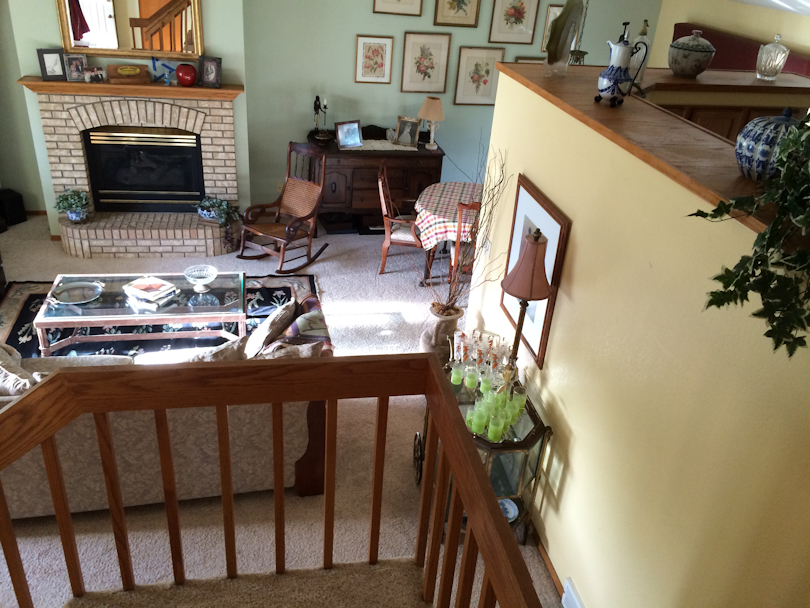
View from the stairs, BEFORE:
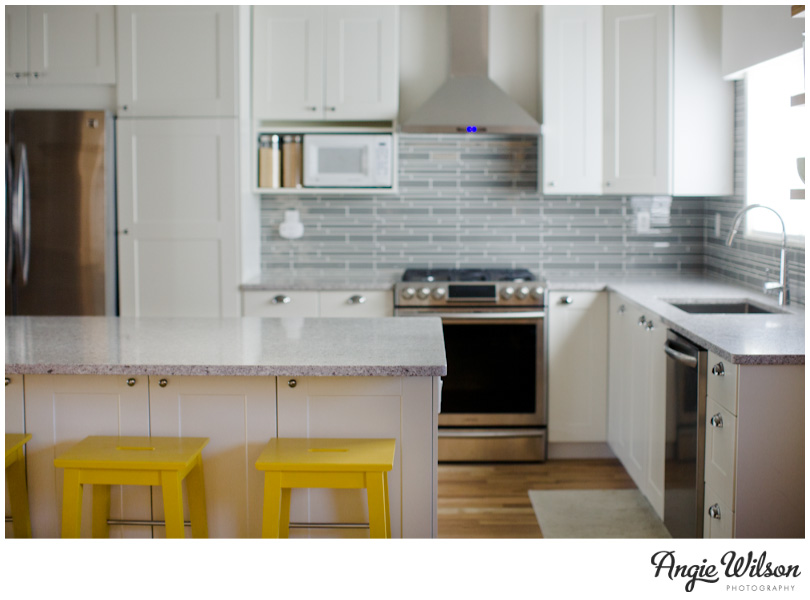
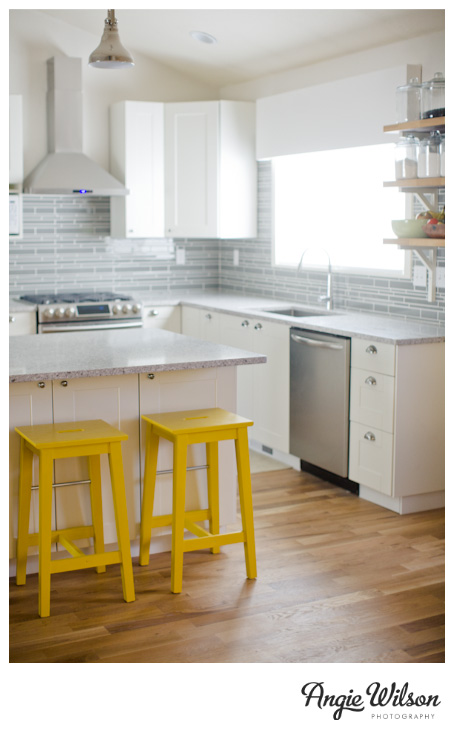
 View from the stairs, AFTER (in case you’re trying to figure this out, the refrigerator is roughly in the spot of the old fireplace)
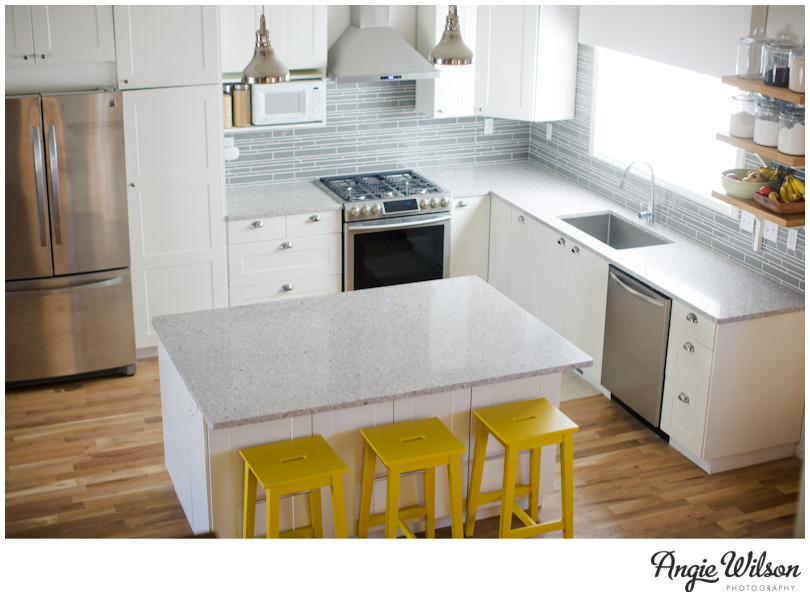 The true beauty in this kitchen is that I was able to make it perfectly functional for ME. Every cabinet I planned to make sense for the way I use a kitchen and the way our family eats.
Like putting the dishes in a drawer right next to the dishwasher since my boys are the ones who are usually in charge of loading/unloading.
And packing the pantry full of pull-out drawers to hold all of our canned goods.
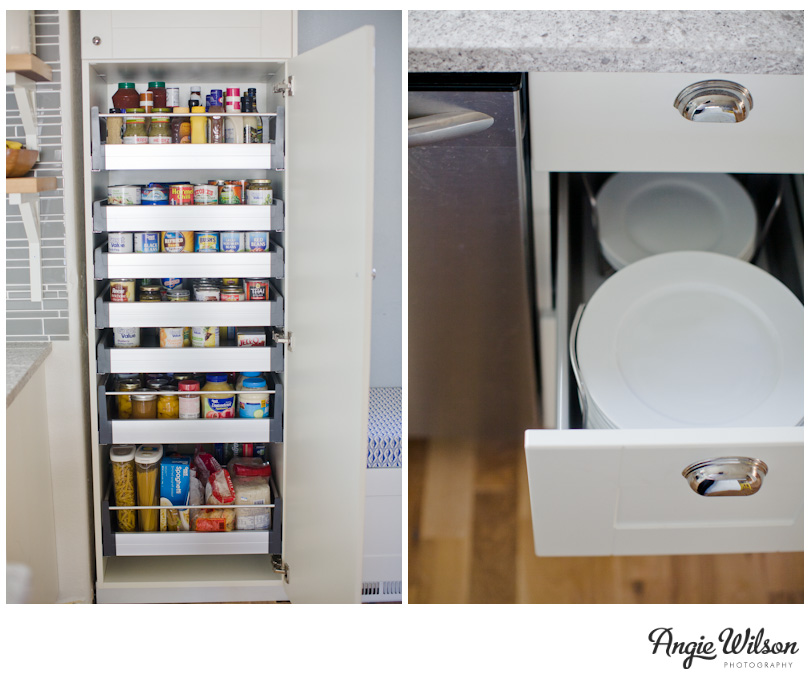
Most houses seem to have double bowl kitchen sinks, but I only ever use one bowl. I found this giant, deep, single bowl sink in my search, and I love it. 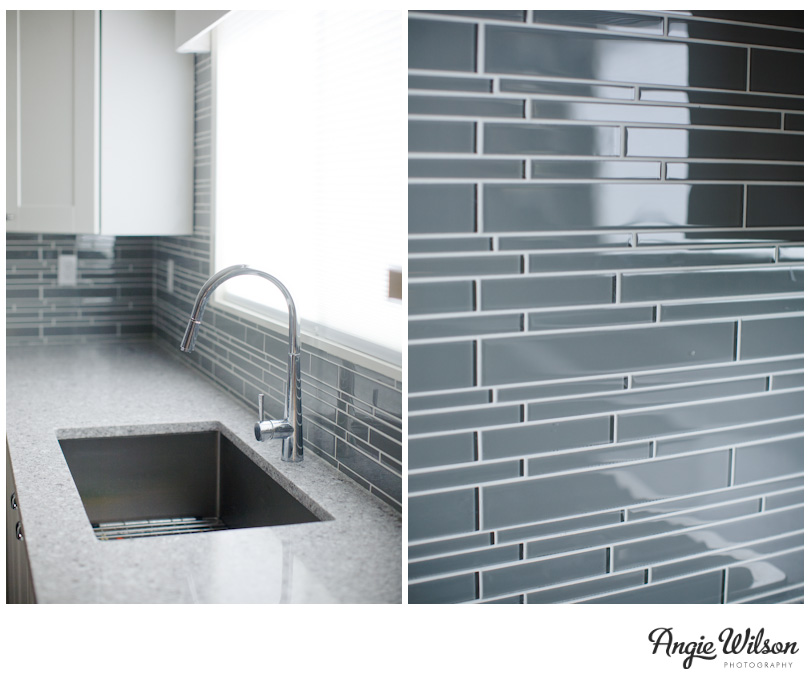 Oh, what a beautiful thing, to have a perfectly organized tupperware drawer. :)
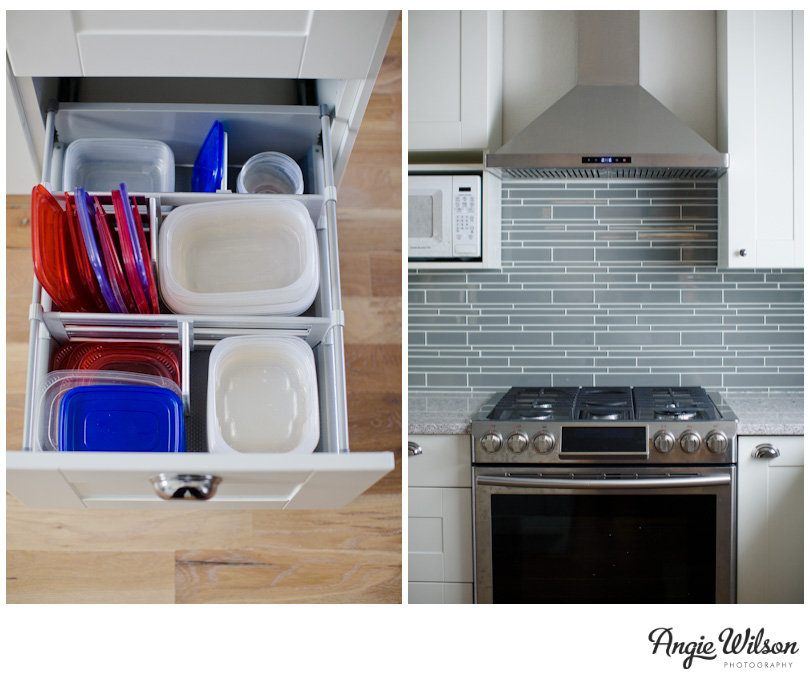 View looking into the old dining room/new kitchen, BEFORE:
View looking into the old dining room/new kitchen, AFTER: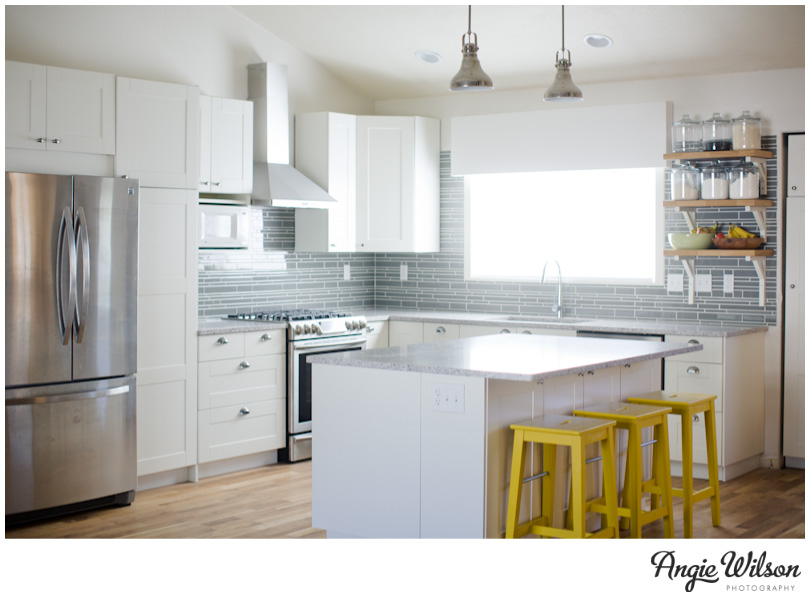
There it is! Lots more to do around here, but I’m happy to finally close the chapter on our kitchen renovation! THANK YOU to those who helped us–my mom for playing with our children for hours while Jim and I worked almost every.single.weekend, my dad for helping me paint, rip out old countertops, put on the cabinet doors while Lucy napped, Jim’s dad for helping Jim with electric/window/range hood, both Steve and Colin for sharing their collections of powertools, our realtor Craig Cowley, and all of the strangers that post home-improvement how-to tutorials and videos online. Thank you thank you thank you. :)


LOVE it!
Wow! You never cease to amaze me, this looks so fantastic!!!
Oh my! This is amazing! You inspire me! 7.5 months pregnant AND 3 kiddos at home. I want to know how you juggled all of that! Spill your secrets! Also, I want to see more photos of your living room – it looks TOTALLY different! Good for you!