
DIY Bathroom Reno
At some point earlier this year I decided I wanted to learn how to build furniture. I’m not completely sure what sparked it, though it was likely a combination of factors. Searching for bathroom vanities was a big one. Our home has three bathroom vanity cabinets in bad shape that need to be replaced, and the thought of dropping $$$$TONS$$$$ wasn’t appealing, especially since nothing I found was quite what I was looking for in terms of style or function. Last year when we redid our kitchen I spent many evenings assembling Ikea kitchen cabinets. There might have been some mystery to it before then, but after that I realized all a cabinet really is, is a box with doors. Easy. I can make that myself . . . right? Discovering Ana White’s website (tons of free furniture plans and tutorials) was another factor that fanned the flames of my furniture-building fire. Although I didn’t end up using any of her plans to build the cabinet, it was super useful to browse through other projects to get an idea of the basics.
So I decided I’d start figuring out this whole furniture-building thing by making a new vanity cabinet for our main level half bath. No big deal if it didn’t turn out awesome because it’s just the powder room. And no need to make something complicated since all it stores is tons of toilet paper and cleaning supplies. Seemed like a good place to start. The week before my birthday Jim asked me what I wanted to do to celebrate. I told him I wanted to build the bathroom vanity cabinet and LUCKY FOR ME, my birthday fell on a Saturday this year, so that’s exactly what I got to do. Here are a few shots.
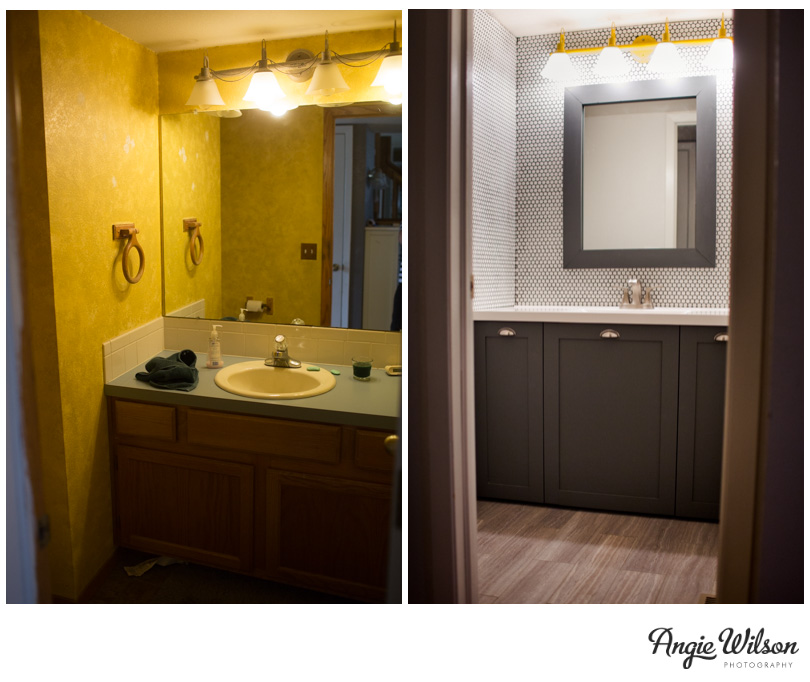
Before on the left: yellow walls, blue laminate countertop, giant mirror, there is just SO MUCH not working here.
After on the right: aaah, that’s better. :)
My cabinet sketch and random notes from pricing out various stores’ lumber and plywood:
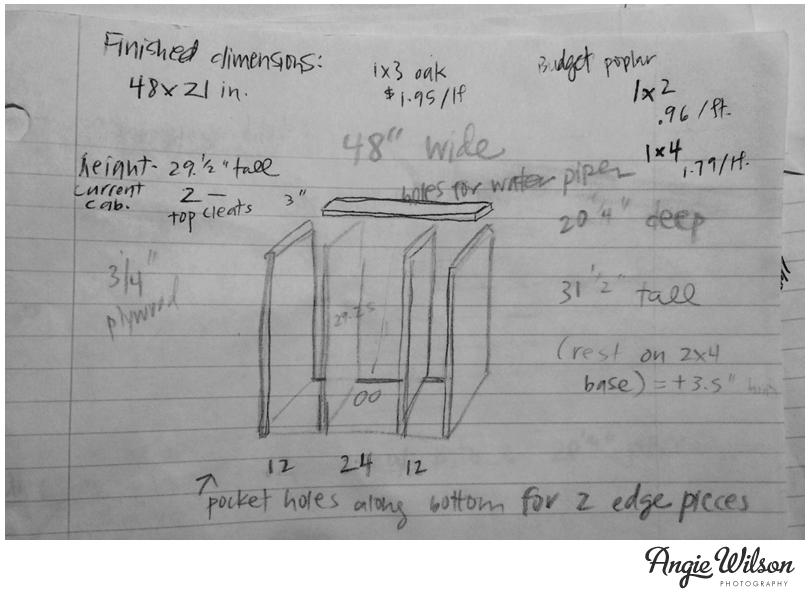
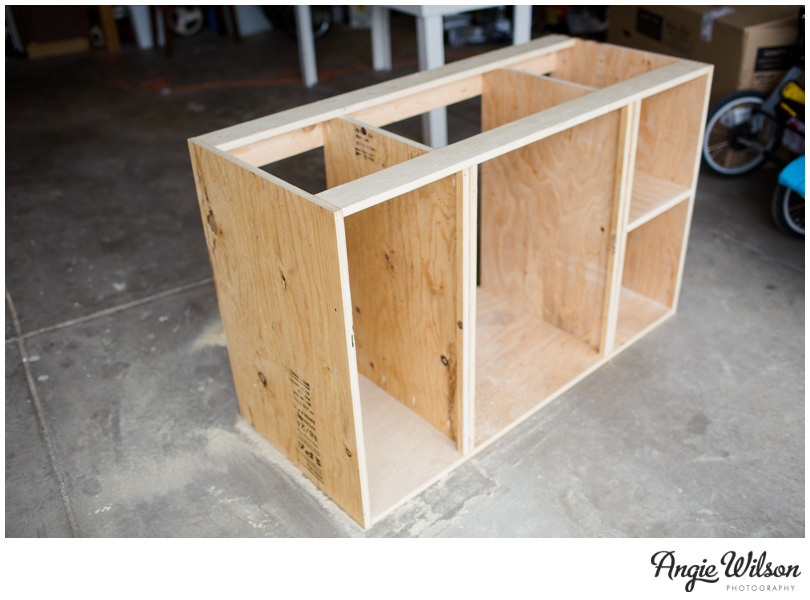
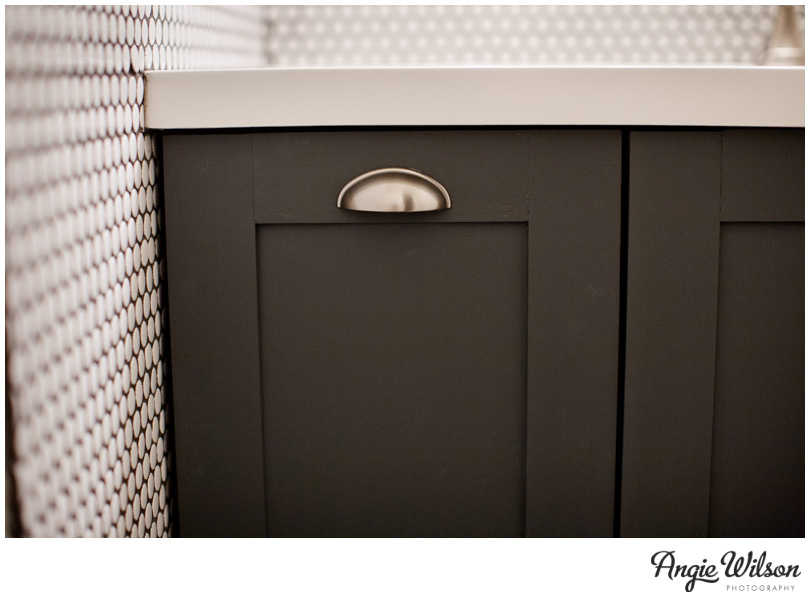
I ultimately went with the most affordable option–pine lumber and basic 3/4″ plywood. I was worried I would completely screw this up, and didn’t want to mess up with more expensive oak, birch or poplar. The whole cabinet (the box, doors, hinges, pulls, and a sample-sized jar of grey paint), cost me about $70 to make.
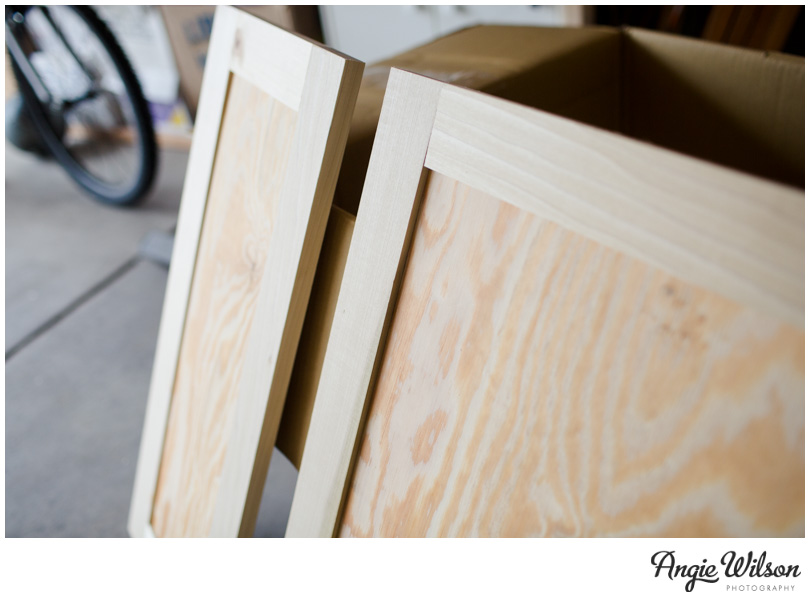
 Though I came up with my own plan for the cabinet, I used Ana White’s plan for making the cabinet doors. Super easy. And so beautiful. I love shaker style cabinets.
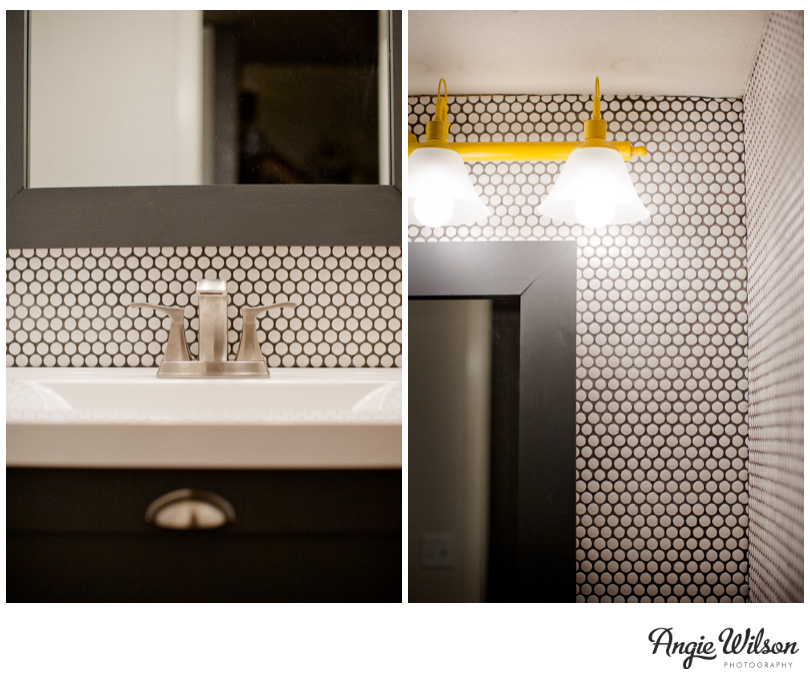
Bathroom light before: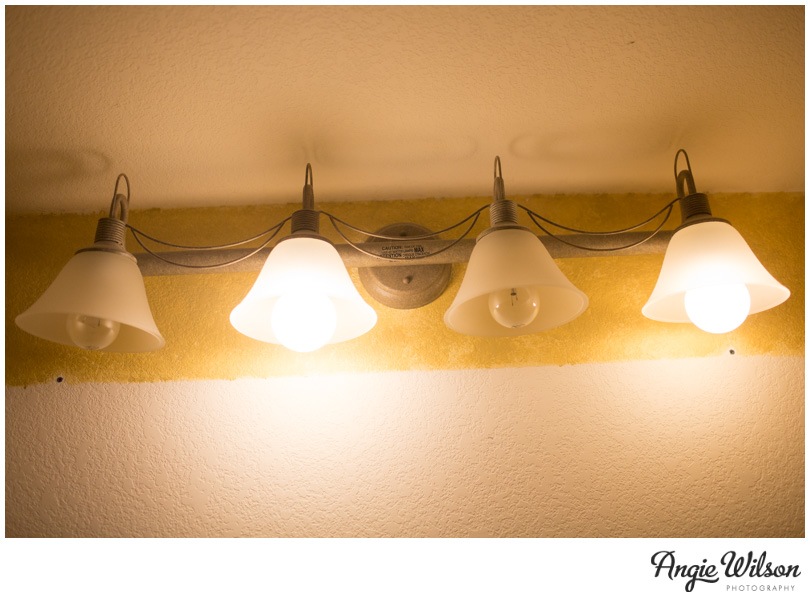 Bathroom light after. I reused the old fixture, but trimmed off those random pieces hanging in between each light with metal cutters. I asked Jim if we should go “modern & classy” and spray paint it brushed nickel, or “modern & fun” and spray paint it yellow. Fun won:
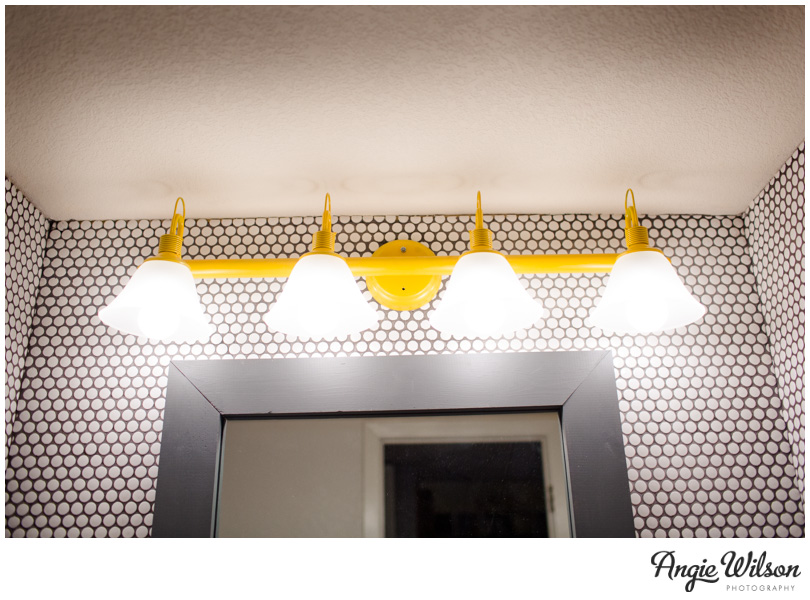
The new mirror is actually 1/3 of the old one. I bought a $3 glass-cutting tool and spent one frustrating hour during Lucy and Jack’s afternoon nap cutting a piece to the size I wanted. Luckily the old mirror was ginormous so it was okay that I messed up TWICE. By my third and final shot, I got this piece. I framed it with some 1×4’s that I cut and then painted with what was left in my tiny sample-sized jar of paint. Boom. Practically free.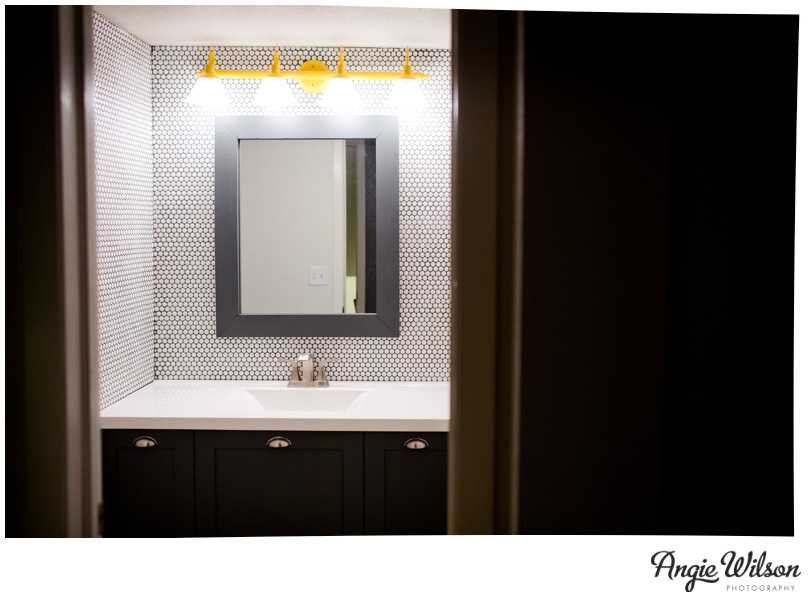 Picking out a new faucet was TOUGH. While I was staring at 200+ options I told myself I couldn’t spend more than $100, so this is the one I decided on. $88.
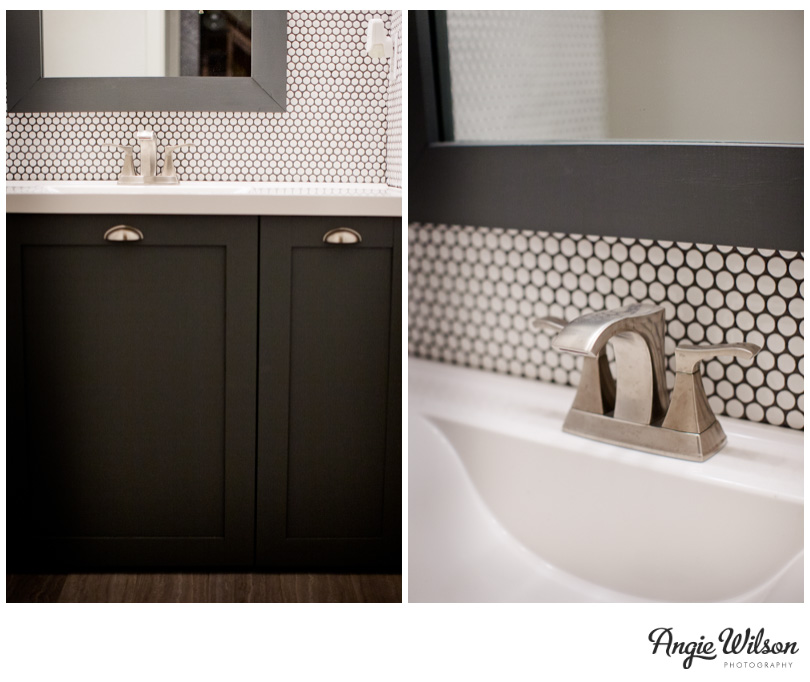 Penny tile! I’ve been wanting to do penny tile somewhere in our house, and the powder room seemed like a good place for it. Putting it in wasn’t terrible. But grouting it…..UGH! Took. Forevvvvver. I was thinking it’d take about an hour, so Jim and I started around 10pm one night. Not a good choice. One hour? More like four. Haha. I’m only laughing now because I’ve caught up on all the sleep I lost that night.
There it is! We still need to put up the baseboard trim and hang a few pieces of art, but it’s almost done. What should I build next?!
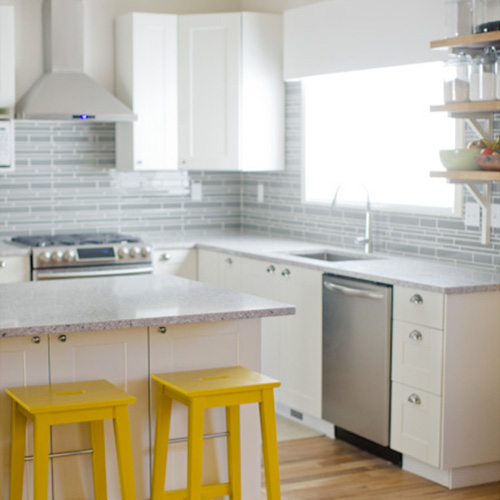


So impressed! Did you lay the tile wood grain floors too or is that wood?
Thanks Julie! We did the floors too. They are actually just groutable peel and stick vinyl tiles. Super affordable and much easier than installing real tile. Hopefully they hold up well.